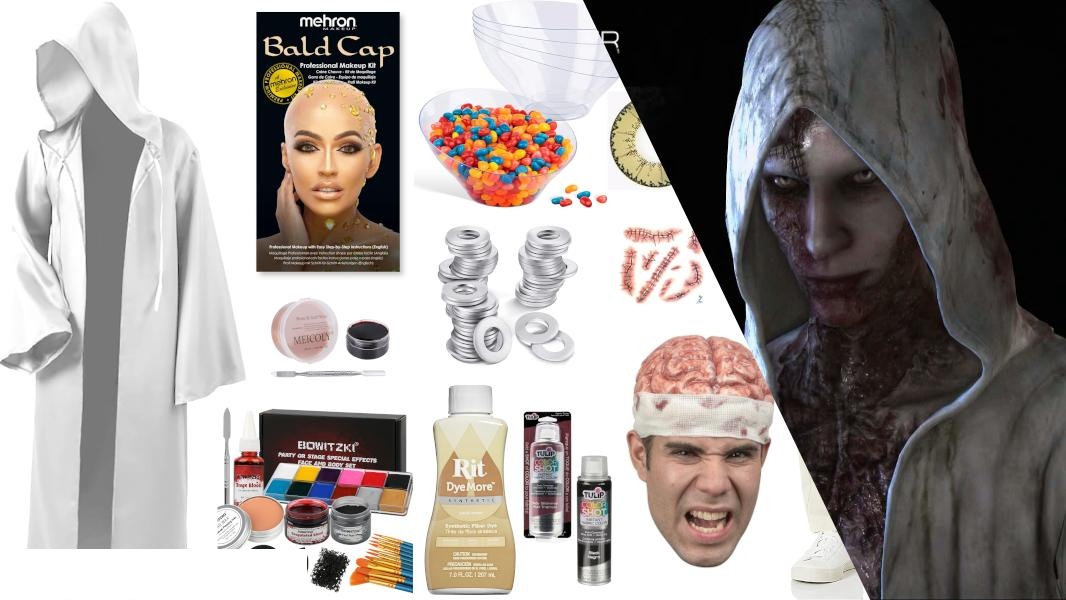
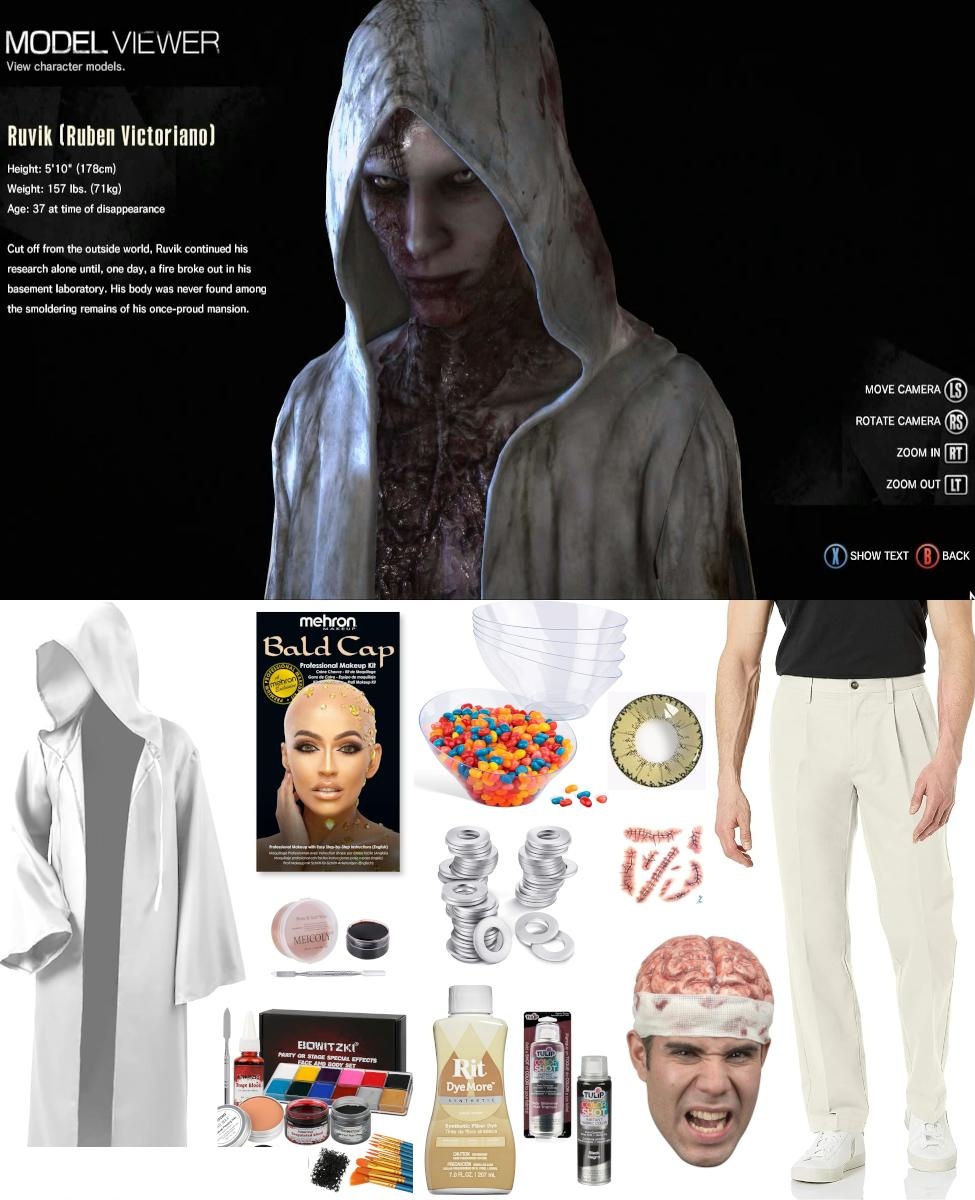
What You’ll Need

Long White Cosplay Cloak With Hood

Mehron Professional Bald Cap

Scar Wax With Blood SFX Makeup Kit

SFX Makeup Kit With Paints

Plastic Party Bowl (Cut for Head Casing)

Aluminum Washers (Head Details)

Rit Sand Stone Fabric Dye

Tulip Colorshot Fabric Spray Paint (Ruby Shimmer)

Tulip Colorshot Fabric Spray Paint (Black)

Uniqso Sweety Devil Yellow Cosplay Contacts
Temporary Tattoo Scar Stitches

Latex Brain Cap (Cut for Visual Under Plastic/Over Bald Cap)
Stone Colored Men’s Pleated Pants
Ruvik’s presence throughout The Evil Within hinges on a silhouette that feels both ghostly and medical. He wanders the shifting corridors of STEM draped in an oversized, ragged hooded cloak that leaves his heavily burned face and disfigured scalp half-hidden in deep shadow. Recreating this costume requires balancing two distinct elements: textile distressing that looks genuinely decayed rather than painted on, and a layered special-effects headpiece that reflects his horrific cerebral experimentation.
Because the outfit relies on minimal garment layers, every piece of distressing and prosthetics carries visual weight. Clean fabrics or flat makeup will flatten the eerie atmosphere immediately. Taking the time to build depth into the scorched textures and tarnished head hardware makes the finished look believable from across a convention hall.
Dyeing and Weathering the Cloak
Off-the-shelf white hooded cloaks are universally too clean and bright for Ruvik. To create the sickly, unwashed parchment color seen in the game, submerge the Long White Cosplay Cloak With Hood in a bath of Rit Sand Stone Fabric Dye. Synthetic blends absorb dye unevenly, which actually works in your favor here by creating natural mottling across the shoulders and drapery. Rinse thoroughly and let the cloak dry completely before moving on to surface distressing.
Once the stone base is set, attack the hems, cuffs, and hood opening with fabric spray. Tulip Colorshot Fabric Spray Paint in Black gives you controlled shading to mimic soot and charred edges along the bottom trim. Layer in light bursts of Tulip Colorshot Fabric Spray Paint in Ruby Shimmer around the hem and inner hood folds to suggest dried, crusty gore without turning the fabric into a cartoonish bloodbath. Sandpaper or a wire brush dragged along the raw edges will fray the synthetic weave nicely.
Trousers and Lower Body
Underneath the flowing cloak, Ruvik wears loose-fitting patient trousers that hang straight down. A pair of Stone Colored Men’s Pleated Pants matches the neutral tone and vintage hospital aesthetic shown in the medical ward sequences. Keep them slightly wrinkled rather than crisply pressed, and rub a small amount of diluted black paint or charcoal powder into the lower cuffs so they blend with the grime on the cloak hem.
Constructing the Head Casing and Prosthetics
The centerpiece of the build sits beneath the hood, where Ruvik’s cranial scarring and STEM connections show through. Begin by securing your hair flat and applying a Mehron Professional Bald Cap. Blend the edges with liquid latex or pros-aide along your forehead, temples, and nape to ensure a smooth foundation.
To build the experimental dome effect, cut a clear Plastic Party Bowl down with heavy shears to match the curve of your upper skull. Beneath this clear shell, trim a section from a Latex Brain Cap to fit flush over the crown of the bald cap. Glue Aluminum Washers around the rim and entry ports of the plastic bowl using flexible adhesive to emulate the surgical bolts and drainage rings used in the machine setup.
Burn Textures and Facial Details
Transitioning from the plastic casing to your facial skin requires thick, dimensional texture. The Scar Wax With Blood SFX Makeup Kit lets you build raised, torn skin margins that overlap the edges of the clear dome and the bald cap seam. Press the wax out thin at the borders, then stipple the surface with an open-cell sponge to mimic third-degree burn tissue.
Color the built-up areas using the SFX Makeup Kit With Paints. Work in layers: dark purple and deep red in the recessed valleys, followed by bruised yellows, bone whites, and charcoal black on raised ridges. Press Temporary Tattoo Scar Stitches across the jawline and cheekbones to simulate old surgical sutures holding the traumatized skin together.
Finish the face by inserting Uniqso Sweety Devil Yellow Cosplay Contacts. The stark, sulfur-yellow iris cuts right through the dark interior of the hood, creating an unnerving contrast against the charred red and gray tones surrounding your eyes.